GLUTEN-FREE PACKED LUNCHES FOR SCHOOL
For the past 14 years or so I have made packed lunches for my children, only one of whom has gluten sensitivity. Strangely enough, I found it easier to pack for the gluten-free lunch box as I had so much prepared before-hand and I had a “system”. I would like to share my top five tips with you and help make this a stress-free experience both for you and your child.
The “lunch box”, thermos and bottle
It’s important to choose the right lunch box that will be practical, non-toxic and make the food look appealing.

PlanetBox – lunchbox
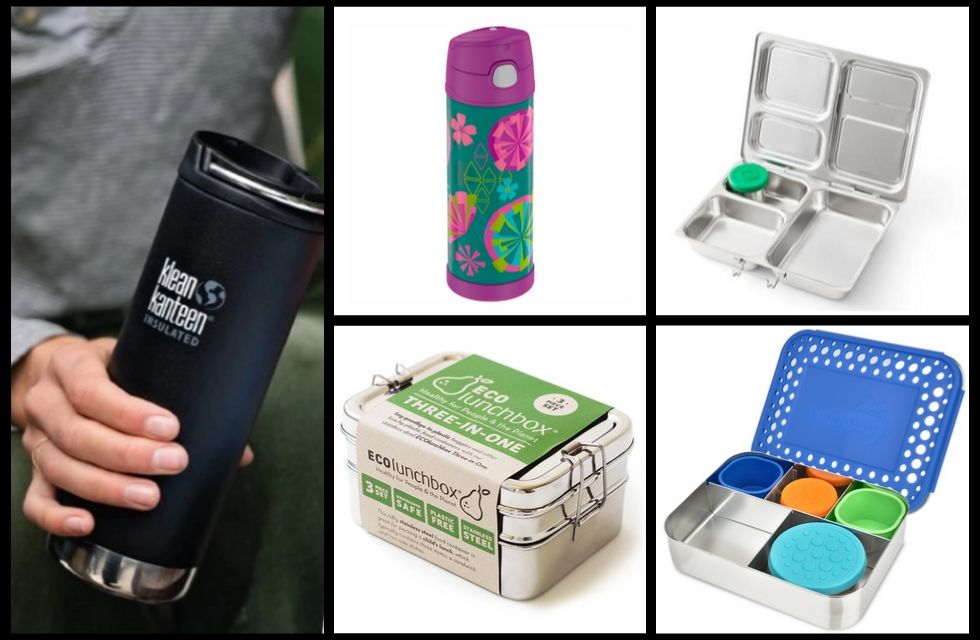
In terms of brands, I like the EcoLunchBox and the Lunchbots as well as the PlanetBox that have several configurations you can choose from.
These are all stainless steel, sturdy, easy to clean and look pretty cool. I would suggest going for one that has at least 4 sections to help create a nutritionally balanced meal. For hot lunches it’s best to use a wide-mouthed, insulated thermal container, that can keep food warm for at least 4 to 5 hours.
Invest in a good quality thermos like the one by Stanley adventure, Thermos Foogo or others from the Thermos brand as well as Lunchbots Insulated thermal container. For drinks bottles, we like Klean Kanteen, which come in a variety of sizes and colours and are also excellent for freezing smoothies the night before which will be lovely and cold and thawed out by lunchtime.
My top five tips for gluten-free packed lunches
Tip 1 – Create a lunchbox chart for the fridge
Create a chart for lunch box ideas. Break them into these categories:
- main course
- fruit
- veggie
- snacks
- drinks
Write the list on a large piece of paper and stick it on the fridge door. Add and take away items from the list with the changing seasons and changing taste buds (see table one for ideas).
On those mornings when you have to juggle multiple activities the list will be your best friend to play pick and mix from. When you have a hit with a particular meal or snack at home make sure you add it to the list. Don’t worry if your list is short to begin with, you can build on it over time.
Tip 2 – Get your kids to help choose recipes
Get the kids involved in choosing recipes. Get recipe books, magazines and recipe cards from supermarkets and get them to pick and choose from those enticing images. You can then decide which ones you will make that will be practical and that they will like.
Take a look at our recipe section (particularly the gluten-free ones) on our website for inspiration. (All the recipes on our website are gluten-free, dairy-free, refined sugar-free and many of them are also grain-free.)
Tip 3 – Batch cook and prepping
Batch cooking and batch prepping are essential. Sundays are a good time as well as randomly throughout the week when you have the time and energy.
You could look at batch cooking:
- Meatballs
- Patties
- Rice and beans
- Whole roast chicken (then strip, slice or chop into pieces)
- Home-made chicken nuggets
- Casseroles and soups for hot lunches
- Beef or vegetarian chilli
- Boiled eggs (do a batch then place them whole in the lunch box or chop them up with some cucumber and mayo and wrap in lettuce leaves or a gluten-free tortilla)
You can also mix things up by using quail eggs – kids can easily handle and pop in the mouth and they are a bit “different” and fun. Often, I will take frozen patties or meatballs out of the freezer in the morning and place in the lunch box and by lunchtime, they are fully thawed out and ready to eat.
Extra tip here: create lucky dips!
Make little bags of snacks of both perishable and non-perishable food and do a lucky dip in the mornings. Get a large container for your kitchen top and place all the different non-perishable snacks like sweet potato chips, oatcakes, dried fruit, granola bars etc. in little bags and let the kids pick from the container in the morning – even if that is the only choice they are able to make it will help them feel involved.
You can also make smoothies and freeze them and then place the frozen container in the lunchbox (if you are using one that can take a container) and come lunchtime they can enjoy a fabulous, nutrient-rich cold drink which has also acted as an ice pack in the lunch box keeping everything fresh.
Tip 4 – Utilise leftovers
Use dinner leftovers at least two to three times a week. Basically, you will just make some extra portions when you cook your kid’s favourite meals during the week that can carry well in a lunch box and warm up a portion in the morning or if they can be eaten cold then you can miss this step.
Invest in a good quality thermos for those meals that simply need to be eaten warm. Soups, casseroles, hot pots, sausages and beans, make wonderful warm lunches, especially during the winter months.
Tip 5 – Involve the kids in what goes into the pack
Put the kids in charge of choosing from each category (see Tip 1 above) and for the older children let them assemble their lunch. They will have only one rule to follow which is that they have to choose one item from each category.
Giving hem ownership is one of the most important things you can do to help ensure that the lunch box comes back empty. As long as the list you have made contains foods that are familiar to the kids and they like to eat them, then you are good to go.
Extra tip here: do NOT try and experiment with new foods in lunch boxes. Save those adventurous moves for weekends when the kids are likely to be rested and in a better mood and more open to new ideas.
Do you have tips to share?
I hope that my tips have given you some inspiration for your meal planning for your little ones. A little bit of preparation and time spent planning can make all the difference.
Having your list to choose from is the cornerstone of a stress-free morning and will ensure that on most days the lunch boxes will be returned empty.
I would love to hear if you have any tips that you have found worked – or if you have tried some of my tips, it would be great to know if that worked for you!